Skip to product information


Instant download PDF & PNG File
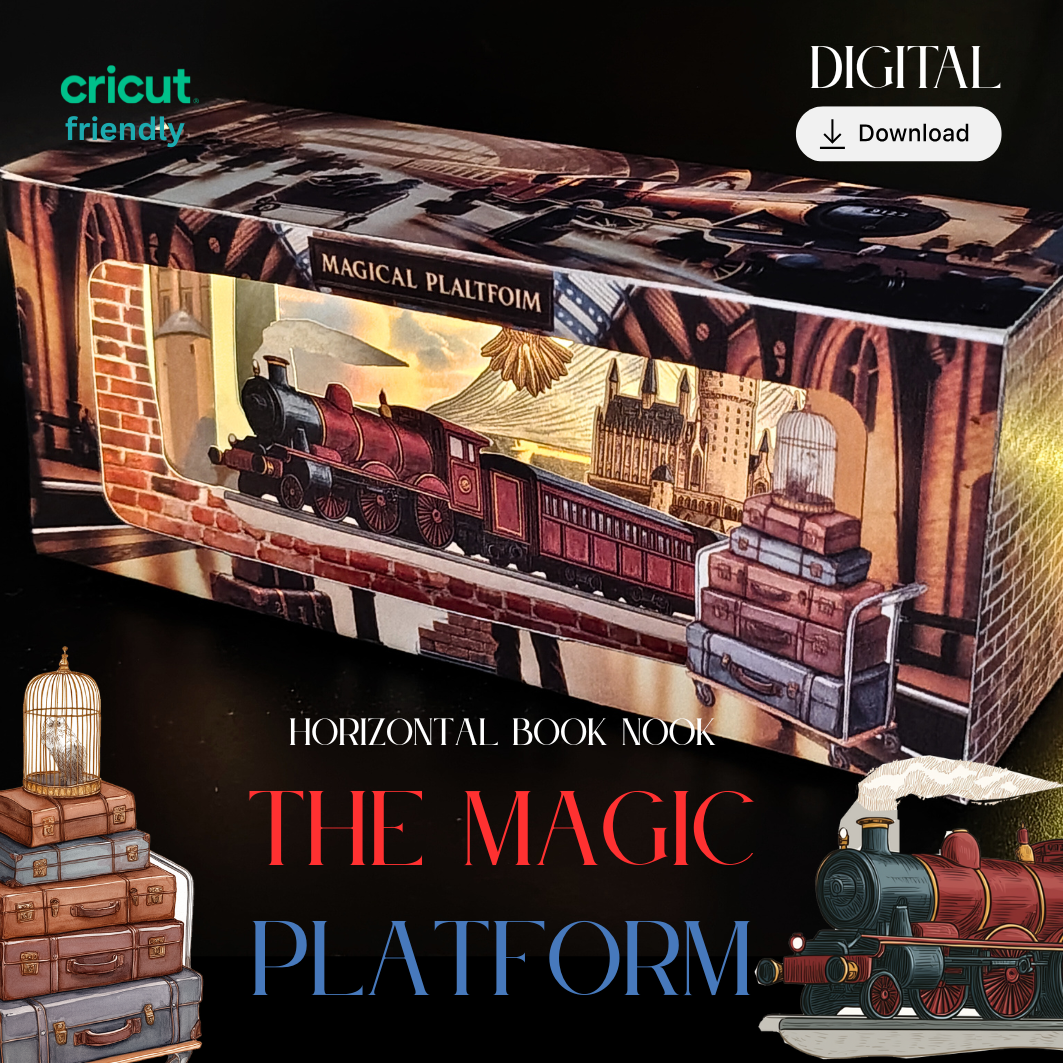
Magical Platform horizontal book nook kit: Foldable Paper Diorama (PDF & PNG Templates)
$8.00
Cricut Machine Compatible
PDF and PNG files included
Pickup currently not available
Instant digital download , no waiting time
Secure checkout, Worry free payment
Details
📚 Step into a world of magic and books!
The Magical Platform horizontal book nook kit brings the wonder of a spellbound library right to your shelf. This foldable DIY paper diorama features intricate shelves, magical books, and glowing charm details — perfect for fantasy lovers, bookworms, or collectors of miniature art. Designed for easy printing and assembly using PDF or Cricut-friendly PNG templates, this kit makes a stunning handmade décor piece or a thoughtful gift.
✨ Why You’ll Love It:
-
Turns any bookshelf into a magical story corner
-
Beginner-friendly printable kit — no special tools required
-
Perfect for fantasy fans, readers, and DIY crafters
-
Reusable download — print again anytime
🧙♂️ How to Use:
-
Print on 170gsm–200gsm cardstock for best stability.
-
Cut along edges, fold as instructed, and glue lightly to assemble.
-
Display between books or as a standalone miniature diorama.
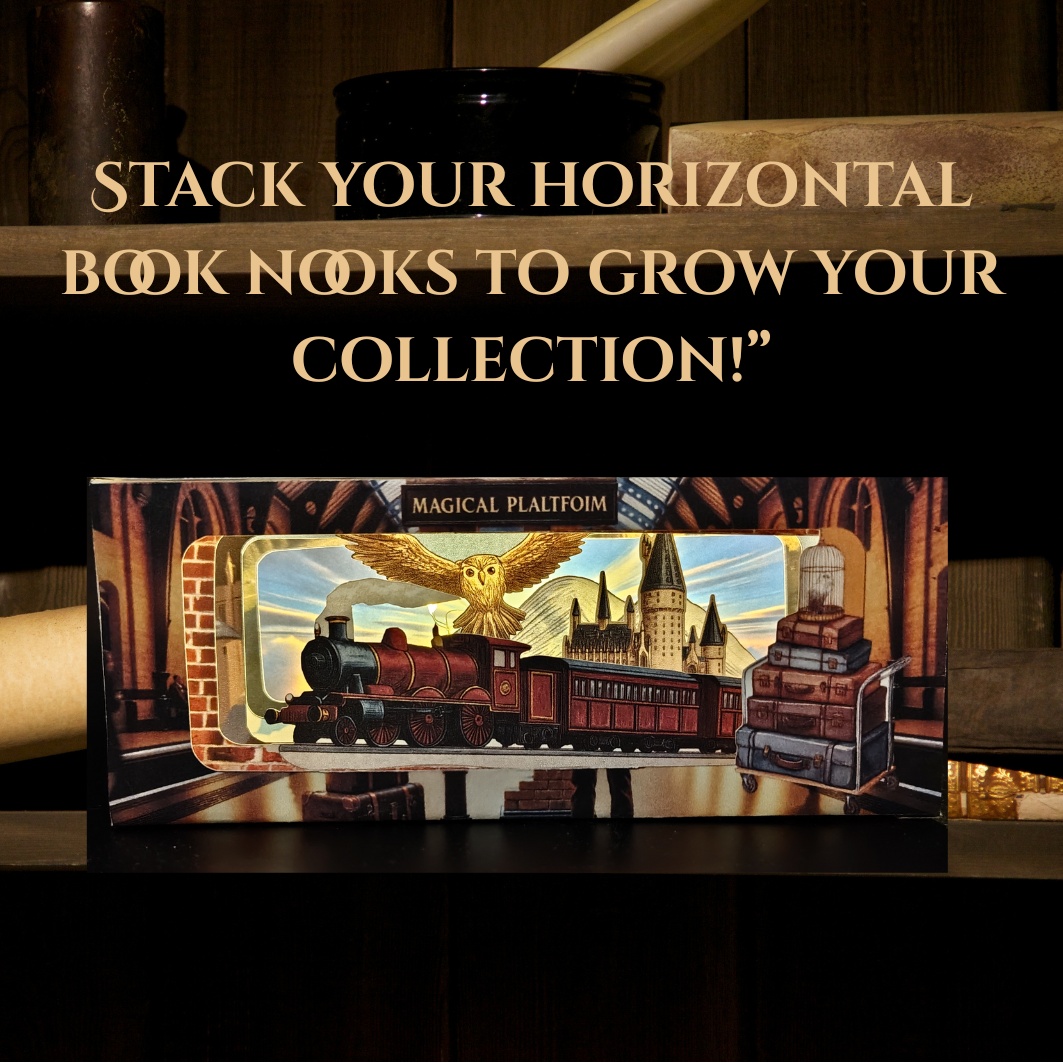
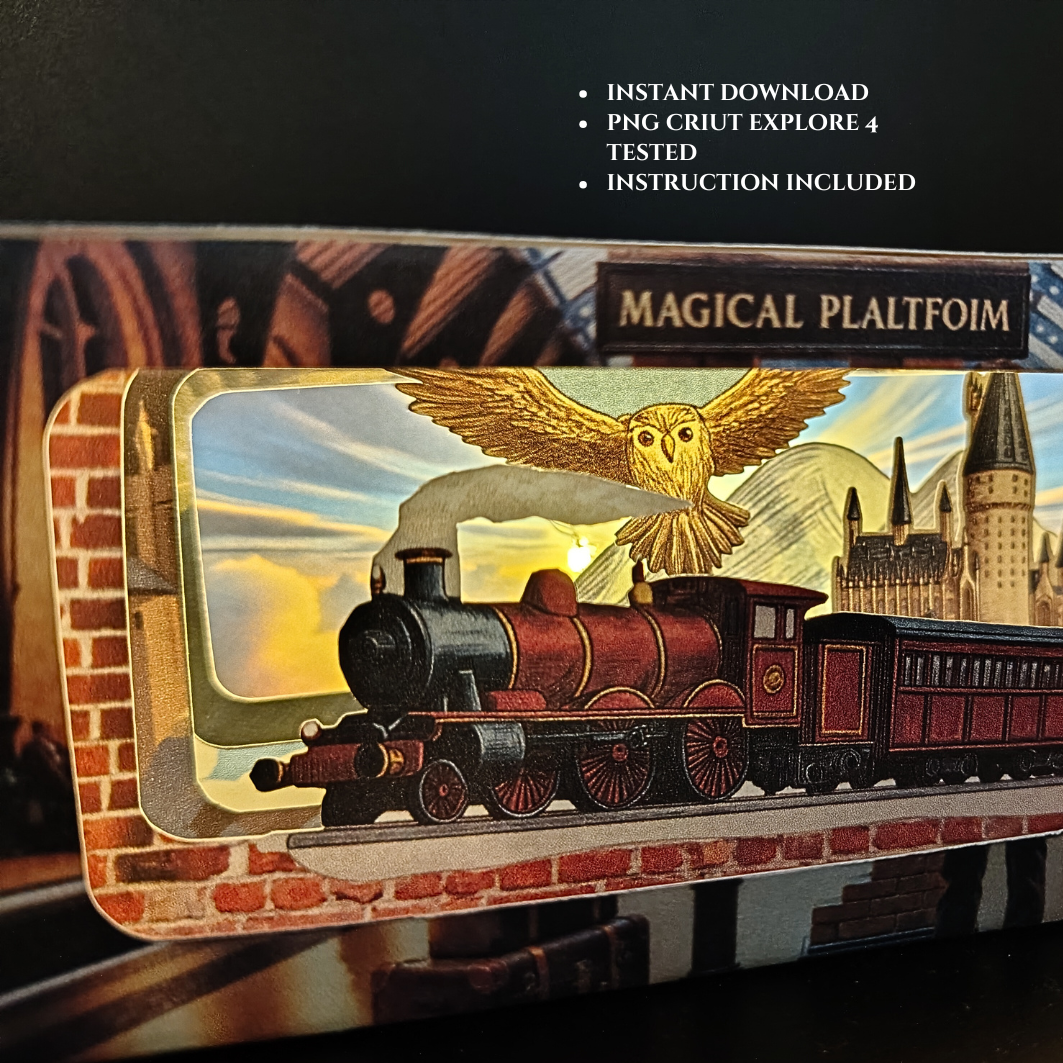
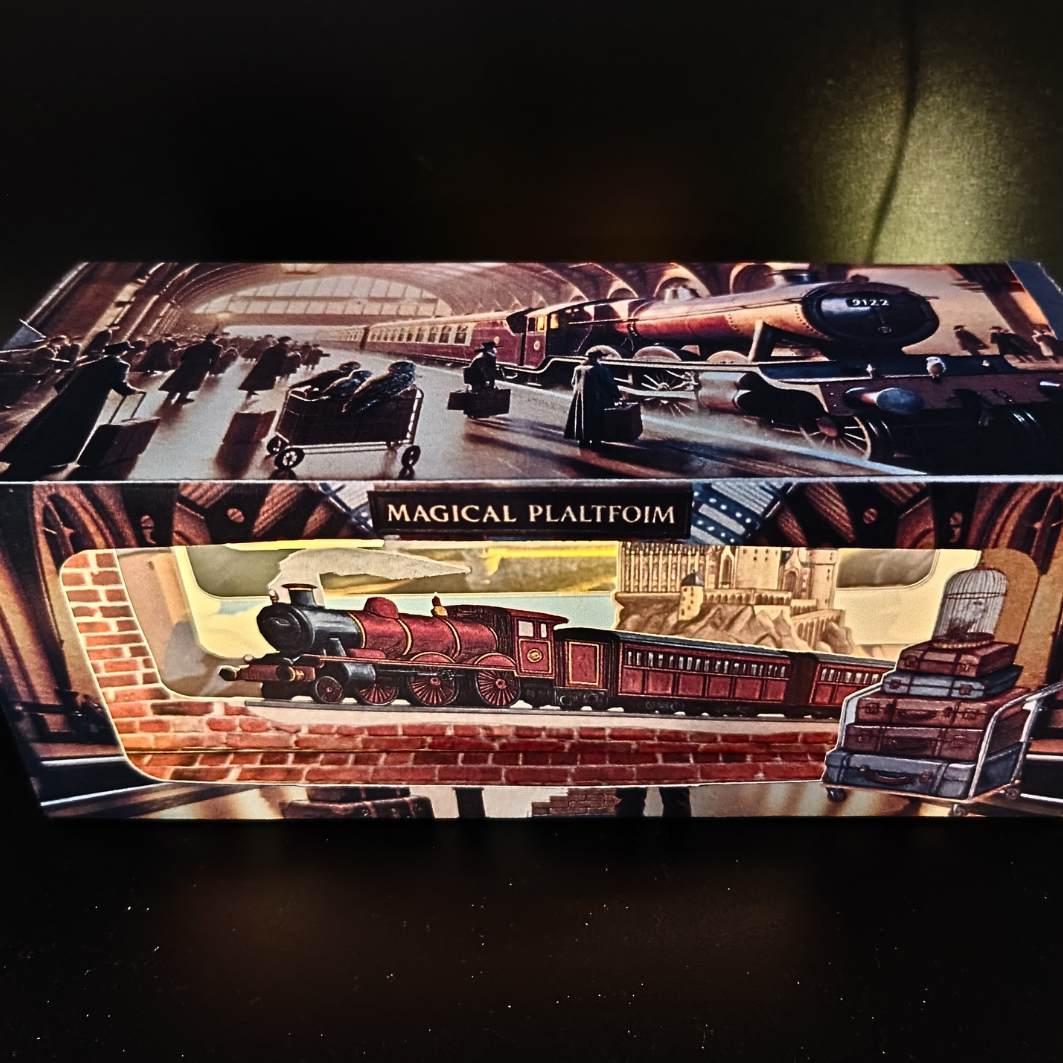
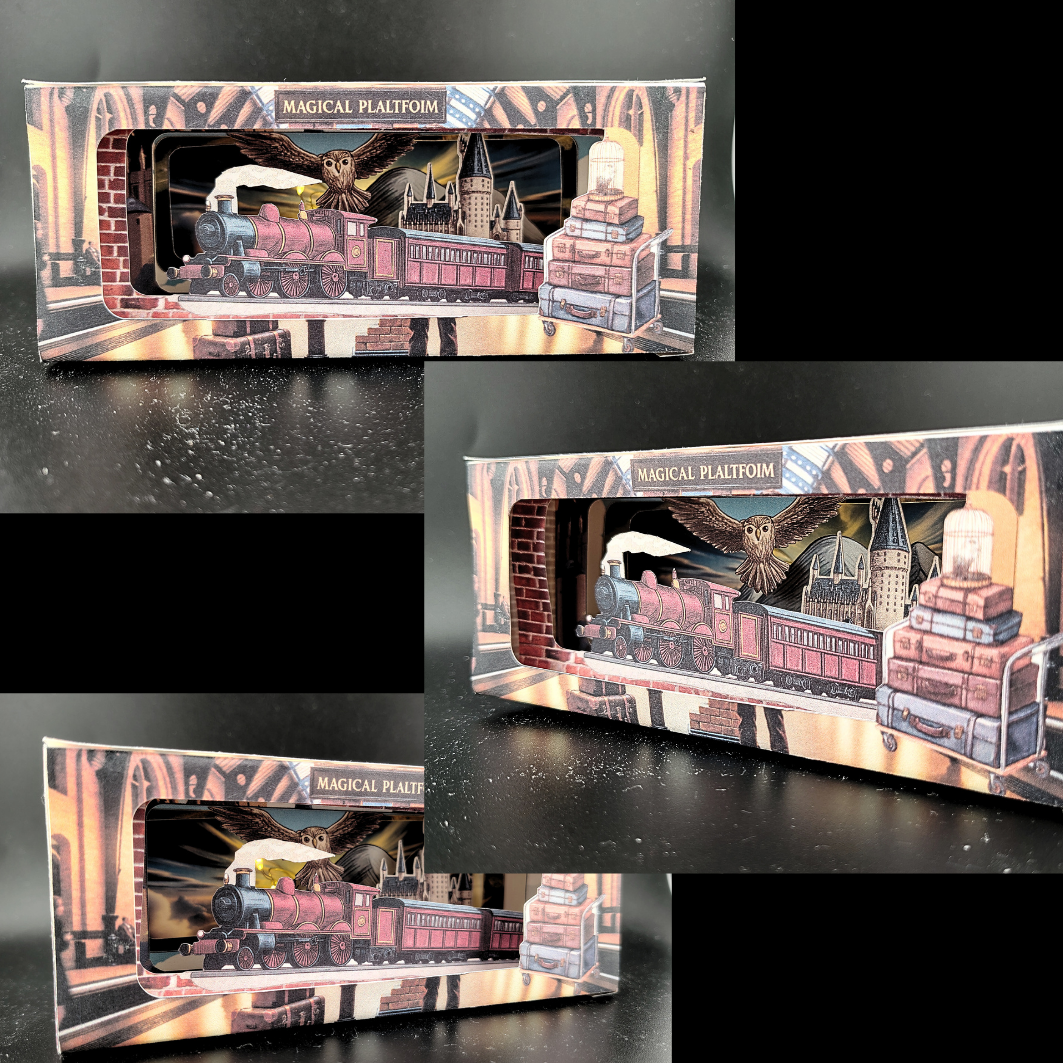
Step onto the Magical Platform — where imagination takes the next train!
This Magical Platform Book Nook Kit lets you craft a stunning horizontal foldable paper diorama, inspired by enchanted train stations and timeless fantasy journeys. Designed for easy printing and assembly, the kit includes PDF and Cricut-friendly PNG templates so you can create your own miniature world of magic, mystery, and travel.✨ What’s Included:
Printable PDF & PNG templates (Cricut compatible)
Detailed horizontal diorama layout featuring train station and magical details
Decorative wall panels, benches, luggage, signs, and magical elements
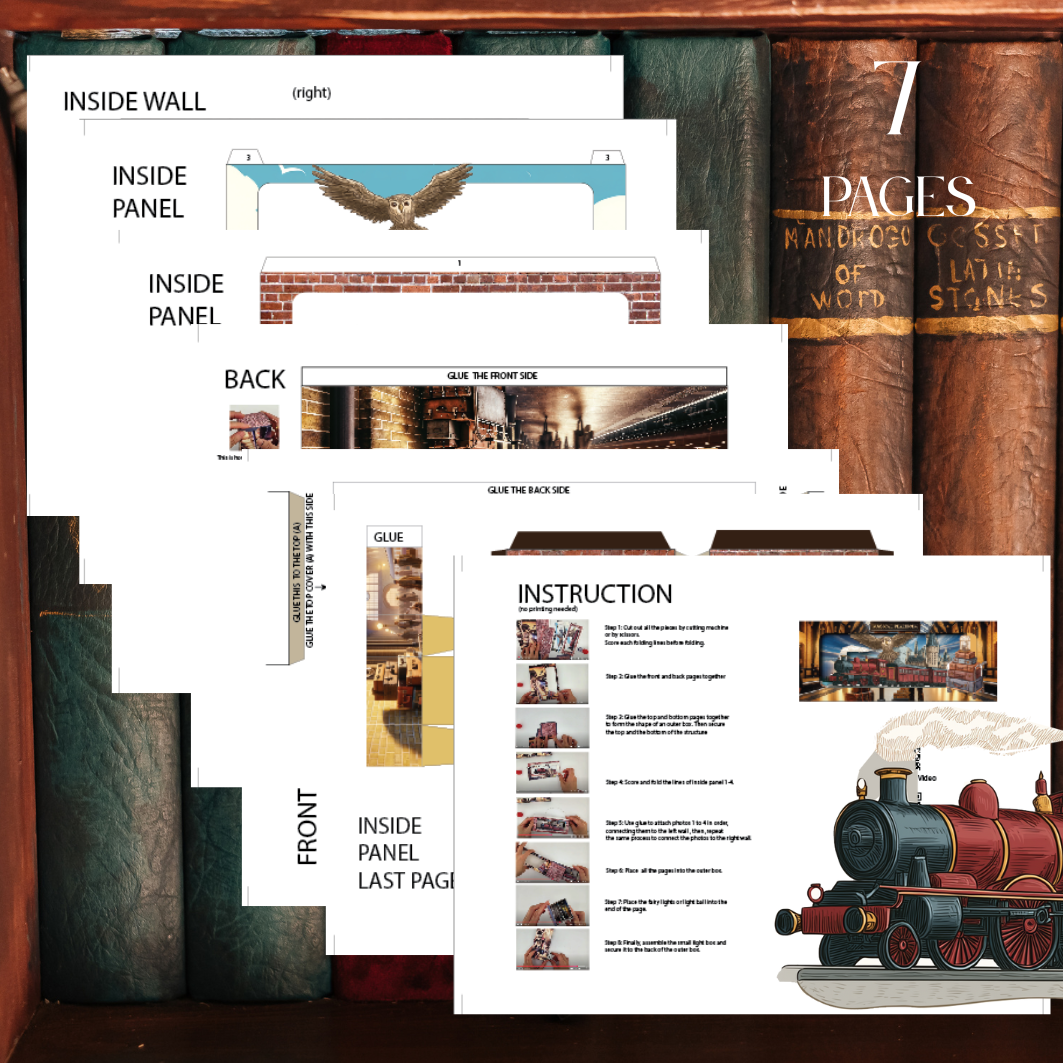
Step-by-step folding and assembly guide
🎨 Why You’ll Love It:Unique horizontal design that fits perfectly between books or displays
Easy DIY project — simply print, cut, fold, and glue
Perfect for fantasy fans, book lovers, and paper craft hobbyists
Beautiful storytelling décor piece for shelves or desks
🪄 How to Use:1. Print on 170–200 gsm cardstock for a sturdy structure.
2. Cut along the guidelines, fold panels, and glue edges lightly.
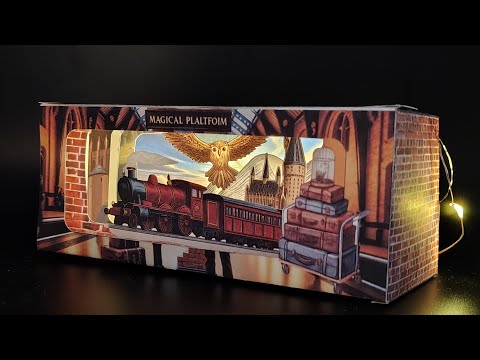
3. Add LED lights or fairy string for an extra magical glow (optional).
------Assembly Instructions---
Assembly Tutorial: https://youtu.be/BajUDeZ_BHA?si=4PxzZrrIAAQH0H68
Upload PNG file to Cricut instruction: https://youtu.be/zUizuB6vzS4?si=m27EXIZ7lrOSZ7lX
1. Print the PDF or PNG templates onto 170 gsm cardstock.
2. Cut out each piece—either with your Cricut (import the files) or by hand with scissors.
3. Score all fold lines (using a bone folder or the scoring tool on your cutting machine) for crisp, clean folds.
4. Fold along all scored lines, checking alignment as you go.
5. Glue tabs with a glue stick or double-sided tape, assembling the diorama walls, floor, and details.
6. Insert a battery-powered LED fairy light through the hole and arrange it inside to highlight the train scene.
7. Secure the cover and the bottom cover.
P.s - Source cardstock, glue, and fairy lights from Amazon or your favorite craft supplier.
My Cricut Explore 4:
https://amzn.to/3GCqHJm
My fairy light :
https://amzn.to/3ImbY5P
My printing paper:
https://amzn.to/44yFXiw
----------How to download----------
Once your purchase is complete, Etsy will automatically send you an email with a download link file. You can follow the instructions in that file to download the PDF and PNG templates.
If you don’t receive the download link file or need any assistance, please feel free to reach out — I’m happy to help!
Important Information Before Purchase
This is a Paper Printable Template:
Please ensure you have a paper printer available before purchasing. The download link (with PDF and PNG Files) will be provided after payment, and an email copy will also include the link.
Paper Template Instructions
Folding & Printing Tips
- Score Before Folding: Lightly score along fold lines using a ruler and a blunt tool (like a scoring tool or butter knife). This ensures clean, precise folds and prevents the paper from cracking.
- Paper Choice: Print on at least 170g cardstock for a sturdy, professional finish. Check more information.
- Printer Settings: Set your printer to "Best Quality" and "Actual Size" (100% scale) to maintain the correct dimensions.
- Test First: Always print a test page on scrap paper to check alignment and color accuracy before using your nice cardstock.
File Specifications
- High-Resolution: Files are provided at 300 DPI in PDF and PNG formats.
How to use this file on a Cutting Machine
- This file is fully tested and compatible with the Cricut Explore.📺 [Check this video] to see how to upload the PNG files into Cricut Design Space.⚠️ Please note: Using a Cricut machine will automatically make the craft kit size slightly smaller than if you cut it manually with scissors.
